

How to Convert Multiple .orf Images to .gltf?
1. Download and Install reaConverter
Download reaConverter and install it in seconds. The setup is straightforward — no complex configuration, no extra software required. Apply image edits like resize, crop, or color adjustment while converting.

2. Load your ORF files
Add ORF camera files to reaConverter. Import folders of RAW photos and process them all with consistent settings.
Use drag-and-drop, folder browser, or right-click conversion from Explorer.

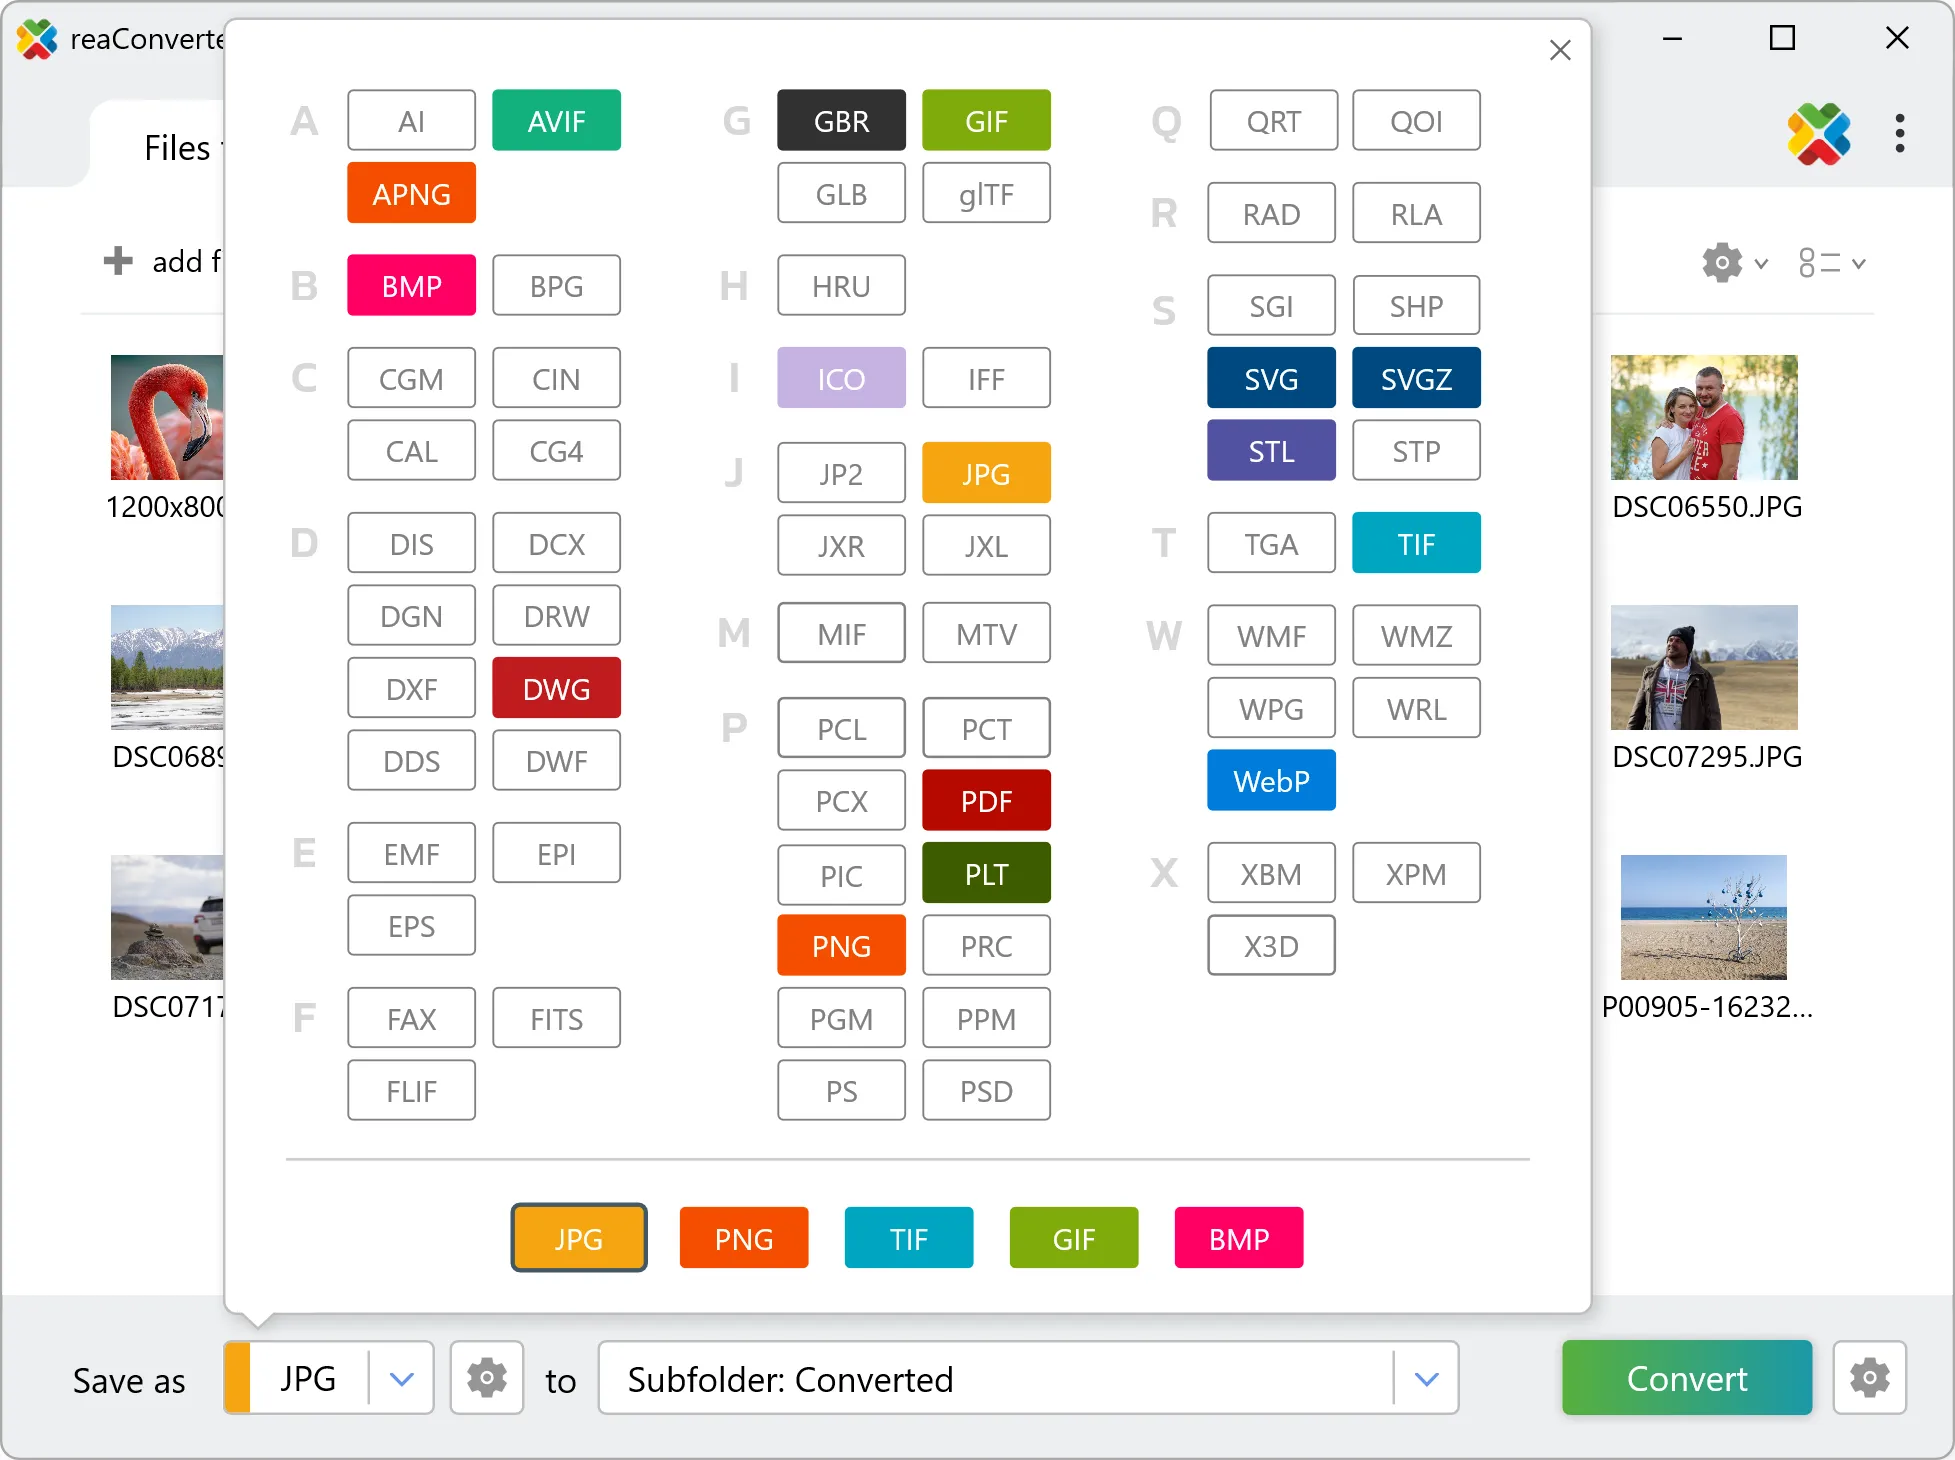
3. Select GLTF as output format
Select GLTF from the format list. Fine-tune color space, compression, and quality before converting your RAW photos.
4. Start ORF to GLTF conversion
Click Convert to start the batch. reaConverter processes files quickly and shows you the status of each one.

Once done, reaConverter shows a summary. Click 'Show converted files' to jump straight to your GLTF output.